Imagined World – Evaluation

Introduction

As the imagine world project draws to a close I wanted to create a blog post discussing the project as a whole, talking about; how my team has performed, communicated and our work flow throughout.

My Team & Their Roles

My team consists of six members; myself (3D / UI / Concept Artist), Nathan Richardson
(3D Artist), Matthew Dickson(Programmer), Bence Franko,(Animator) Luke McFarlane
(Programmer) and Max Ansell(Animator / Programmer).

Game Highlights / Role Breakdown

Game Highlight Video

Feedback

Your project looked great from the early stages and you were always well on top of the technical, animation and construction elements, which is excellent and will serve you well if repeated for the synoptic. Your organisation and work ethic were you strongest asset throughout production, which says a lot considering how good everything else is. Make sure you maintain your approach in the new year because it will guide you to success regardless of the project you choose. Your actual demonstration to the rest of the students significantly undersells just how impressive your project really is – you could’ve demonstrated so much more of it! Be careful with how the synoptic project presents itself because there may well be VIPs at the end of year show. All in all, you’ve done fantastically well and produced the crowd’s favourite project! You should all be very proud of your work.

– Feedback from lecturers on Next Gen Course.

Feedback Review

Obviously we are all over the moon with the amazing feedback we have received, from everyone, regarding our Imagine Worlds submission. As well as this, we are all humbled by being voted the best Imagined World out of the 21 projects submitted.

My Contribution

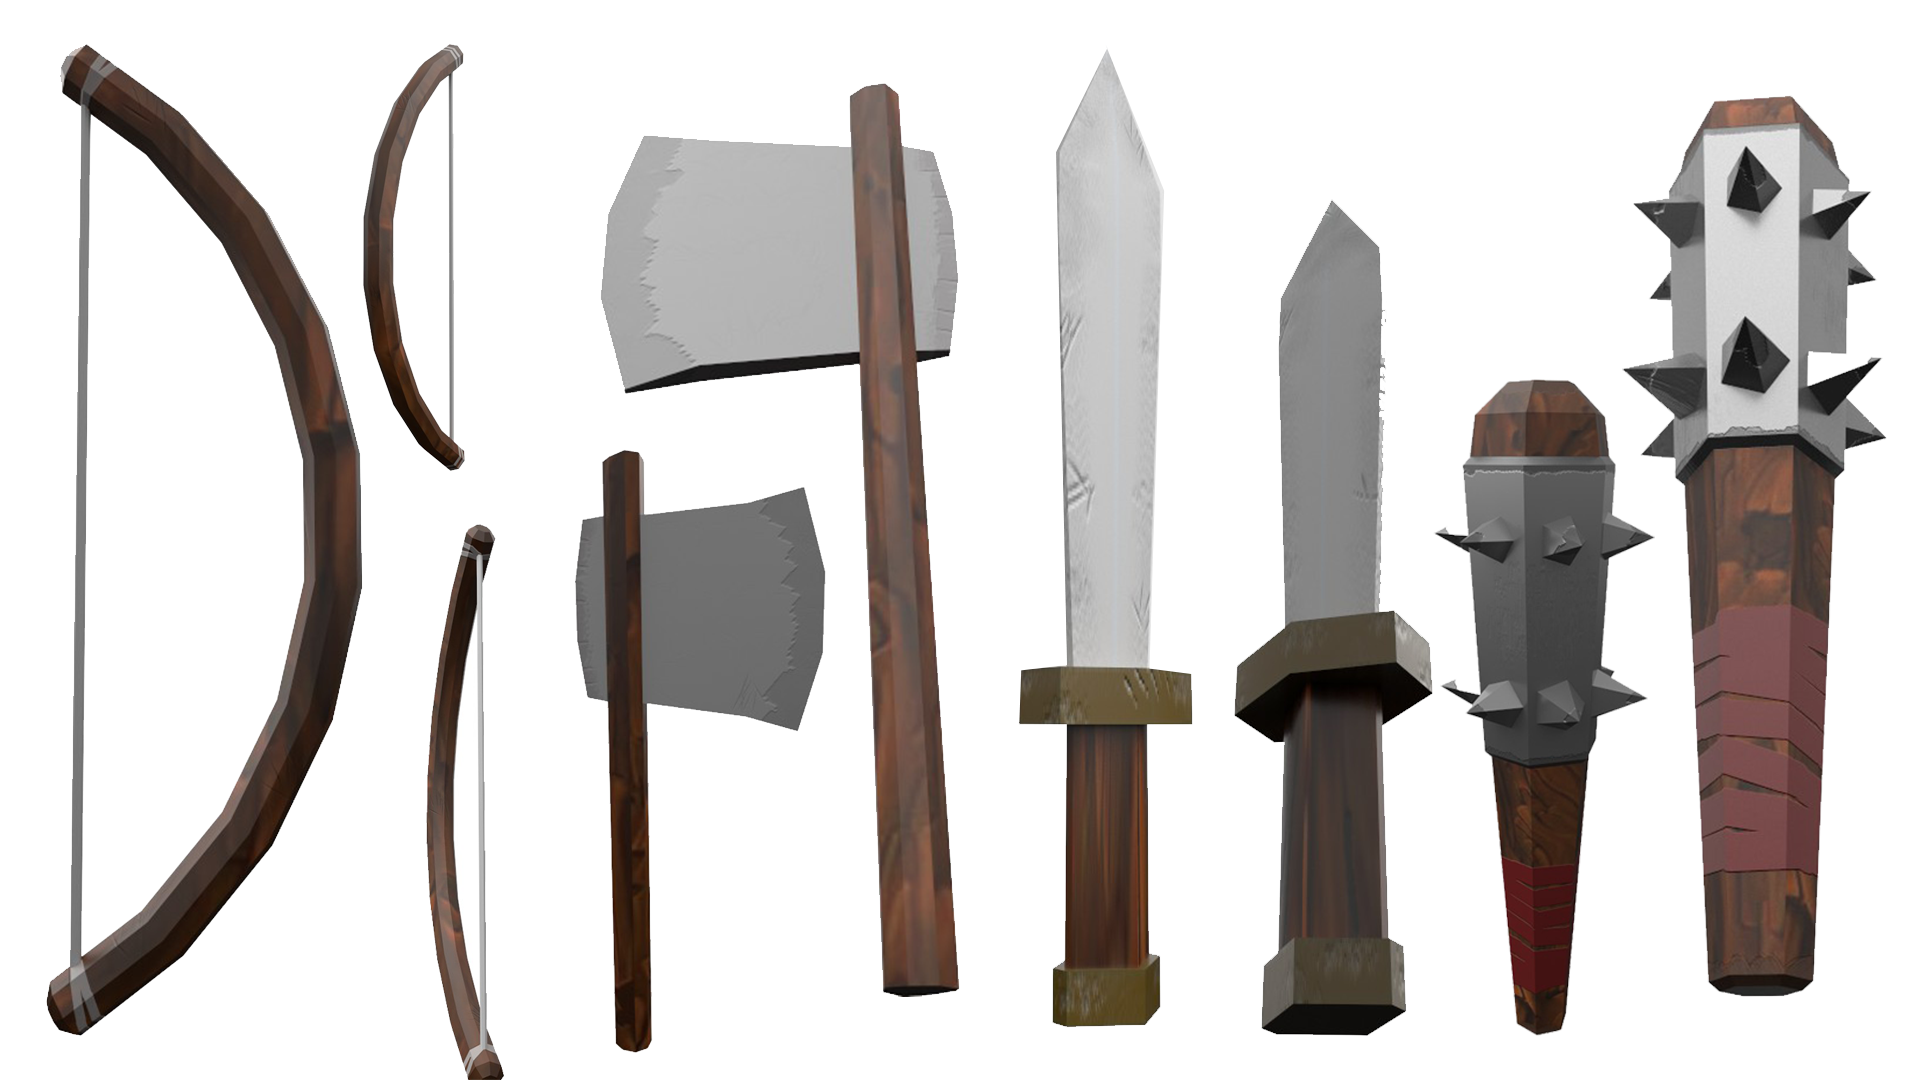
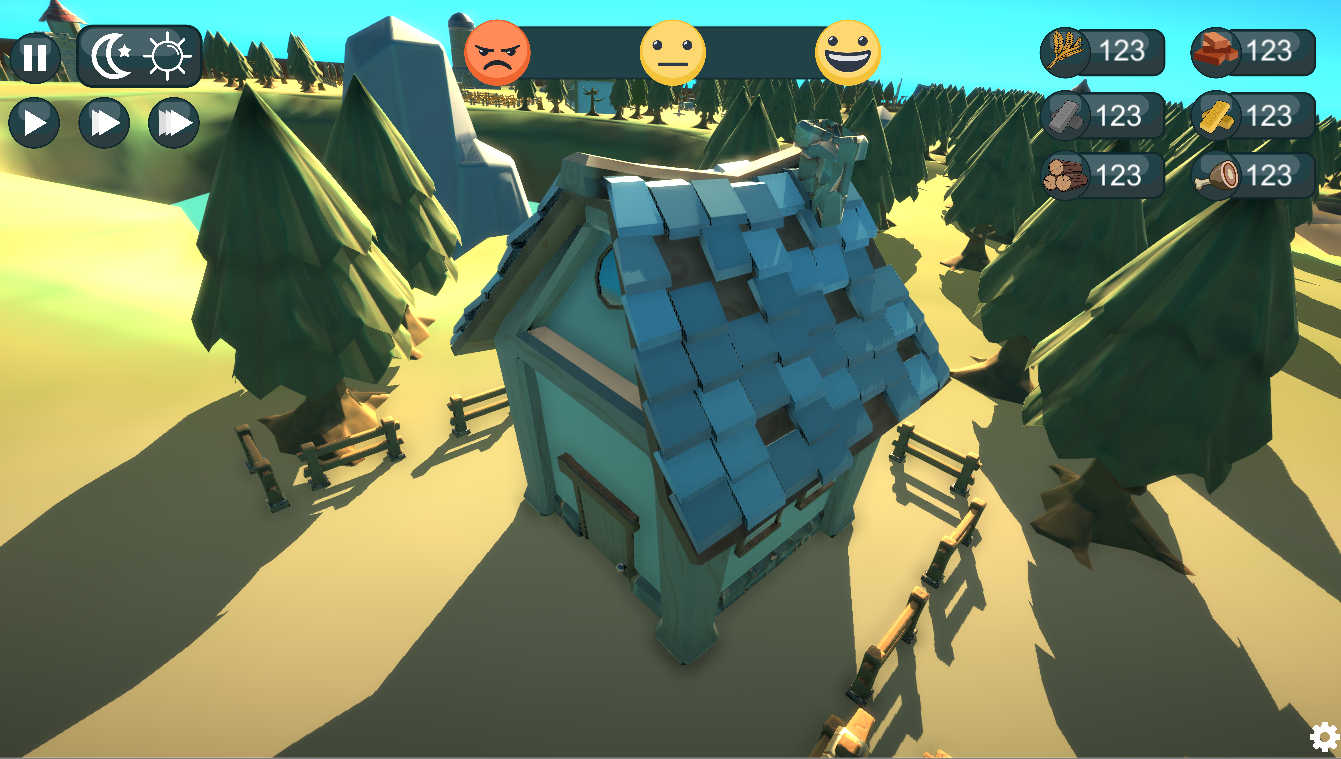
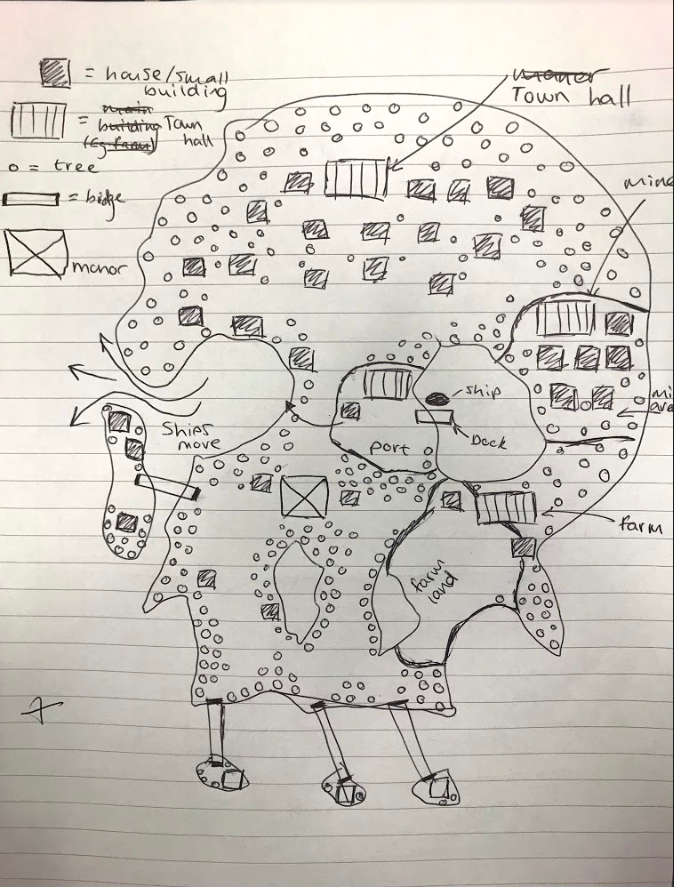
Below I have included some renders of my key contributions to the project. Further Breakdown of each asset will eventually be found on art station.

Overview

To conclude, I couldn’t be more happy with the out come of the Imaged World. Obviously there is so much more I would add and tweak, as would the rest of my team I’m sure. However, for 3 months work I couldn’t expect anything more from my team.

Creative & Technical Peer Review

Assessor name: Max

Feedback:  

The model is very efficient in terms of topology. You’ve used baking efficiently to add surface detail to the mesh. There is a lot of edge loops in the canopy that I feel are not adding any geometry and may not be essential. The art style supplements the simplicity of the mesh really well. I feel that the model has a lot of intersecting faces, this isn’t a massive issue for the model’s use case but could lead to lighting issues when a renderer struggles to distinguish where the light should be hitting the faces.

Overall I think that you have satisfied the needs of the project in a productive way that contributes to another project and that the model and its textures are built with the models exact use case in mind.

Creative & Technical – Tavern Final Submission Renders

Introduction

As per the Creative & Technical brief I had to create a unique 3D model, from scratch, that required some kind of baking to take place for the final product. This could be either modelling purely low to high in Maya and baking it on, or using Mud-box to bake on higher detail onto the low poly model. Personally, I chose to use a mixture of the two to create the best quality outcome possible. In the pre-production section you can see my initial plans for the model, whereas my actual creative process can be located under ‘Creative process’ .

Pre-Production

For my pre-production I have created a PowerPoint document containing: all of my reference images, sketches and baking plan. I have exported this as a PDF and linked it below for your viewing.

Creative & Technical

Creative Process

It was a long process creating my stylized tavern. Firstly, I had to carry out my pre-production, which is shown above. Secondly, I begun blocking out my low poly model. This process allows me get the rough shape without too much effort being required, meaning I don’t risk wasting too much time in case I decide to change my mind. Once I had finalized my low poly tavern model, I then began creating my high poly 3D model, adding extra detail firstly in Maya, and then in Mud-box, to get the maximum effectiveness of detail.

It was now time for Substance Painter. Firstly, I baked the high poly model onto the low poly model. This imprinted all of the surface detail, that I created on the high poly model, onto the low poly model as a flat texture that appears 3D. Finally, I pained on the textures for the building to bring the whole model together.

The two renders above show the impact that baking have on a 3D model. The model on the left-hand side is the original low poly model, and the model on the left is the result of the high poly model being baked onto the low poly in substance painter.

Final Renders

Final renders of the tavern 3D model, including: 3D model, textures and lighting.

In Game Renders

Sketch Fab 3D Look-around

For the purpose of getting a better view of my 3D model I have added my tavern to my Sketch Fab account so that you can have a 3D look around the mesh.

Conclusion

To conclude, I am very happy with how my stylized tavern turned out. I feel like it perfectly fits into the games surroundings. This model took a lot of hard work but I am very happy with the end result. My favorite aspect of the model is the tenting outside: I particularly like the embossed detail and stitching that I added to it.

Imagine World – Guard Tower 3D Model

Tower Render Layout.png

Intro

For the Imagine World project I have been one of two 3D modelers creating the assets for the game. Above I have included my final renders of my guard tower 3D model which is positioned all around the map to protect against attacks.

Team Progress

In my opinion my team has been working excellently, smashing deadlines and producing good quality work to contribute to the Imagine World project. The game is constantly being further developed with new ideas being added to the production plan to extend the game and create the best final product possible by Christmas.

Creative Process

For creating the guard tower I knew I wanted to create a fairly detailed 3D model as it is a fairly major model in the project. Therefore, I made sure to gather plenty reference before attempting to create the tower.

The roof was the most difficult process as ever tile is modeled onto the roof to create a more interesting affect. As for the cobble stone wall, I used a generator texture which allowed me to bake on the cobble stone affect, keeping the model stylized and low poly as well as looking good.

Conclusion

To conclude, I am very happy with the out come of my guard tower. I am always trying out new Technics to create good quality products, and I would say that the processes used to create the tower are definitely processes I will use again. Finally, I am very happy with my teams progress with the game, as well. I look forward to seeing how far we can take the game before Christmas. The Imagine World page on my website showcases the highlights from the project.

Sketch Fab 3D Look Around

https://skfb.ly/6D6pI

Imagine World – Farmer Character

Introduction

As the Imagine World project progresses further, I have begun texturing the different character classes in order to help bring the game together for final submission at the end of December.

Creative Process

The first character I have completed is the farmer. Max 3D modeled the character, just like all the other characters in the Imagine World Project, and I have textured him by: hand painting him in substance painter using a stylist and intractable monitor.

Farmer Render Sheet.png

Opinions

I am very happy with the final product. Max isn’t a primary 3D modeler, he is specializing in animation but wanted to attempt the character models. I am texturing the characters because I am able to make the characters match the colour scheme and style that myself and Nathan created for the game.

Next Steps

My next steps are to continue to work my way through the characters, texturing them to the same standard as the above farmer. As well as this I need to be creating head wear for the characters: 3D modeling, unwrapping, and texturing. Finally, I need to create variations of each character so that they all look slightly different, despite the class, in game. Variations will include; scratches, patches and facial features.

Conclusion

To conclude, I am very happy with the progress we are making as a team and I feel that I am working efficiently to progress through the tasks I have been set. I look forward to having all of the characters complete and implemented in the game.

Imagine World – Weapon/Tools Asset Pack

Intro

For the Imagine World Project (“Ye Olde Simulator”) I am 3D modeling and was tasked with creating a weapon/tool pack for use throughout the game. Below I have included all of the current weapons/tools that I have 3D modeled in Maya and textured in Substance Painter. All the models are very low poly as they are minor details that aren’t crucial models for the game. They are low poly to keep them within the stylized spec of the game and to keep the game as optimized as possible to make the game run more efficiently and smoothly.

Process

I followed the same production process for all of the weapons/tools that I have created. I firstly looked for reference. I will include some reference below. Secondly, I sketched some concepts of the weapons/tools. My sketches will also be below. After choosing my favorite sketch I then blocked out it out and begun modeling it. Once I had modeled each weapon/tool I exported them and gave them to the rest of the team for the animator and level designers to use. Finally, I textured my weapon/tool and rendered them.

Reference

weapon ref.png


Renders 

Weapons.png

Conclusion

To conclude, I am overall very happy with how my weapons and tools turned out. They are all optimized as much as they possibly can be, while retaining the detail they have. They fully meet the colour scheme and overall style of the game. I created the weapons in a fairly timely manor: taking around 10 hours for the entire process from start to end. A full time spent break down will be below.

Time Spent

  • Reference – 1 hour
  • Sketches – 1 hour
  • 3D models / UV Unwrap (Bow, Axe, Sword, Mace) – 4 hours
  • Texturing (Bow, Axe, Sword New & Used, Mace) – 4 hours

Creative & Technical Update

I have decided to make a change to my creative & technical model, changing from an armory to a tavern as our imagine world project more requires the tavern compared to the armory. The updated pre-production pdf is included below. Including two work in progress (WIP) renders. The renders below are substance painter renders which I took to highlight my model and to test out textures / colours to make sure that my final textures work well and that I can get the best quality final product possible.

Texturing is coming along nicely, but there is still plenty of detail to be baked on, as the pdf explains, as well as the entire model to be textured in substance painter. The next thing I will work on is sculpting the wood in mudbox and baking it on.

Creative & Technical

tavern wip 1tavern wip

Texel Density

What is Texel Desnity?

The procedure of ensuring that your 3D models meshes and textures are the correct height, width and depth is called Texel Density. If the Texel Density is correct then your textures and materials will look more crisp and clean instead of blurry.

Improving Texel Density

  • Any non-frozen scale transformations may cause the Layout command to not scale shells properly, in which case you should freeze your model’s transforms first.
  • Backwards-facing shells may cause Layout to malfunction
  • Improperly unwrapped shells (such as planar-projected shells that didn’t have seams cut or wasn’t unfolded) may also lead to poor results

See the source image

Imagine World – Ship

As a part of the Imagine Worlds project I have been tasked with creating a stylized ship to go in the water next to the dock. The ship will eventually be animated sailing in and out of the dock at set times, with characters interacting with the ship. This is why the ship doesn’t have sails in the renders below. I have modeled the sails for the ship and need to texture them next, however, they are not in the renders below as they need to be separate objects for them to be used as cloths and animated in unity (affected by weather/movement).

Personally, I am very happy with how my ship has turned out. It has been a lot of hard work to create this ship and fully texture it, including as much little detail as possible. When the ship is in engine I also plan on adding crates, barrels and other small assets to really bring the ship to life. One the ship is in engine and has been animated I will do an updated blog post including the animations and the ship fully loaded with cargo.

Overall, I am pleased with how my ship turned out as I feel that it meet the spec of the game nicely. The aspect of the ship I like the most is actually the water details I added on top. I feel like I was able to achieve fairly believable puddles on the deck of the ship to make the ship appear more realistic.

Creative and Technical Pre-Production

For the creative and technical 3D modelling project I have created multiple moodboards of inspiration and to help me when producing my 3D model. I have then produced multiple initial sketches, using this inspiration, before creating my final sketch which I have now made into a digital copy, ready for 3D modelling next week. As well as this I have made a high to low baking plan which shows how I will create a low poly model and high poly model and combine them to create an optimized model with good detail. Below I have included the PDF of pre-production for my creative and technical 3D model.

Creative & Technical